
I have been working with this recipe for several years now, and I have actually seen it work wonders for some people. It can help the following conditions. It is not a miracle cure–and like everything, it does not work for everyone.
Even so, this recipe offers improvement for most, great improvement for many, and seems to halt or slow progression for some. It is definitely worth a try for those who want to try a natural method before going for surgery or other eye corrections.
Conditions that I have experienced or witnessed improvement with this recipe, include:
- Cataracts
- Blurry vision
- Lack of focussing ability
- Floating blobs
- Wearing glasses or lens correction
- Eyestrain caused by computer or over use
- Dry eyes
- Red or irritated eyes
Eyedrops Recipe
Part 1
Eyebright herb 1/4 tsp.
Golden seal herb 1/8 tsp.
Raspberry leaf herb 1/4 tsp.
Cayenne powder herb (not essential oil!) 1 drop (1/64 tsp.)
Simmer in 2 cups distilled water for 10 minutes. Cool to room temperature.
Part 2
1/16 tsp. N-Acetyl-L-Carnosine (No other form of carnosine will absorb into the tissues of the eye to dissolve calcium, a primary concern with cataracts.)
1-1/2 cups distilled water.
Combine and stir until completely dissolved.
Combine
Add 22 drops of Part 1 into all of Part 2. Store excess of Part 1 in fridge for up to 3 months. Fill Eyedropper Bottles and store out of direct sunlight.
Use daily, or up to 3 times daily for extreme cases. It generally takes 3 months of very consistent usage to see an improvement. It may take 6 months or longer to reach optimum results.
How to Support Eyes and Vision Restoration–The Rest of the Picture
There is much more that one can do to support eye health and recover from vision loss, cataracts, or even wearing glasses. Not everyone can restore vision, and not every condition can be corrected, but many issues can be resolved over time with an eye friendly diet.
Macular degeneration, cloudy vision, and cataracts, can all be improved or resolved by adding certain key nutrients to our diet. Lutein, astaxanthin, and zeaxanthin are anti-oxidants that the eyes must have in our daily diet to maintain health. Most Americans do not get enough of these vital vision nutrients, which results in macular degeneration and deterioration of our vision.
Omega-3 fats, proper calcium ratios, retinol, and B vitamins all play critical roles in keeping the health of our eyes, even more so as we grow older. And simply supplementing nutrients such as lutein and zeaxanthin, may not give us the results we are looking for. This is because supplementation of some of these nutrients can cause toxicity. In many cases, the form of nutrients taken as a supplement is not the same as the nutrients found in our foods. Often, they are cheaper versions, or synthetic versions, prone to be less absorbable and less effective.
So how do we get enough of these critical nutrients in our diets? One simple answer is, by drinking a daily smoothie with all of the nutrients needed to restore your vision, regenerate your body, and eliminate aging signs.
Download our short booklet with 13 smoothie recipes and get started today!

As one who eats very few animal products, I am often looking for creative ways to add protein into my diet. This Mocha Protein Nut Bars recipe qualifies for raw, gluten free, free of added sugar, vegan, and high protein all in one.
Best of all, these nut bars are delicious!
MOCHA PROTEIN NUT BARS
Blend together in Vita-mix or high speed blender:
1 cup raw organic pecans
1 cup raw organic walnuts
8 drops coffee essential oil
1/2 t. unrefined sea salt
You will need to pulse several times to make a fine ground that is the texture of a dry chunky nut butter. When the mix holds together fairly well, scrape it out into a small bowl and add:
3 Tablespoons of Sunwarrior Classic Protein Powder (chocolate flavor) or another chocolate protein powder of your choice
4 dates, without seeds
4 Tablespoons pure organic chocolate powder or cocoa
Stir well. Shape into small bars or round cookies. You can eat them right away, or put them in the fridge for up to 24 hours.
If you would like, you can also make a chocolate topping. It is not vegan, unless you use the vegan substitution.
CAFE TOPPING
Combine in a small bowl:
2 cups plain yogurt with live cultures (we use home made goat milk yogurt)
1/2 teaspoon stevia powder (to taste)
1 teaspoon vanilla extract (we use an alcohol free version)
8 drops coffee essential oil
Spread the topping over bars just before serving. This is a rich and flavorful dessert or snack that everyone will enjoy.
Vegan substitution: Instead of using yogurt, substitute 2 cups of coconut cream, or culinary coconut milk that has been refrigerated for at least 1 hour. The vegan version will be a little thinner, but still delicious!

Herbal Remedies for Hernia
There are several types of hernias, and not all of them are conducive to healing with natural remedies. Hernias can be serious and should be examined by a health professional.
Inguinal hernias (groin area), umbilical hernias (near the naval), and incisional hernias (following surgery) are the most likely to improve or heal with herbal remedies. Other types may improve, but should be evaluated before beginning an herbal treatment.
This is a three part method that will support hernia recovery in 3 different ways. It begins with taking an internal herbal remedy formula.
Internal Formula–Herbal Remedies for Hernia
These herbal remedies for hernia are derived from traditional Chinese formulas used for centuries to heal hernias and other abdominal issues. I have offered here 2 different choices, for those who may have a challenge locating some of the herbs. Both of these formulas are effective.
Hernia Formula One
Hawthorn berry-2 parts (Chinese hawthorn berry)
Fennel seed-1/2 part
Grapefruit seed-1/2 part
Litchi seed-1/2 part
Mix the herbs together in a blender or Vita-mix. Mix on high until a coarse powder is formed. Put the powder into size 00 capsules, and take 1 to 2 capsules 2 times daily.
Alternatively, the powder can be made into a tea. Use 1 teaspoon of ground herbs in 2 cups of water. Simmer for 5 to 8 minutes and strain. Sweeten with honey or stevia if desired. Drink 1 cup daily.
Or, use the following formula instead.
Hernia Formula Two
Hawthorn berry–2 parts
Dioscorea (wild yam)–1 part
Marshmallow root–1 part
Ginger root–1/2 part
Licorice root–1/2 part
Use the same methods as described above. You may use it as a tea or in capsules.
Plan on taking your herbal formula consistently for at least 3 months. Herbs often take weeks to show results, as they rebuild organs and tissues on a slow, gradual basis. It is necessary to use them every day to get the desired results.
Hernia Poultice
To support your recovery, you will also benefit from applying a poultice to the local area where the hernia is located.
Comfrey powder (or crushed leaf)–6 parts
Colloidal silver–1 part
Terebinthine pine essential oil–several drops
Cypress essential oil–several drops
Costus root essential oil–several drops
Distilled water–as needed
Combine all ingredients. Add only as much distilled water as necessary to moisten all of the ingredients and help them stick together. Apply enough of the poultice to lightly cover the hernia area. If possible, wrap it with saran wrap to hold it against the skin without drying it out. Leave it on for a few hours, or overnight if possible.
Apply it every day for the best results.
Targeted Exercise
The final piece of the puzzle for healing hernias, involves exercise. It is important to exercise very consciously–being certain to do no harm! Targeted gentle exercises to strengthen core muscles can be found on you tube. Always begin gently with just a few repetitions, and never continue if there is pain with any exercise.
Dietary Considerations
These dietary changes can also help support hernia recovery. Eat plain, unsweetened yogurt with live cultures (not the sweetened dessert kind), several tablespoons daily. My favorite brand to recommend is Mountain High, but the best is the one you make yourself with un-homogenized cow or goat milk. One tablespoon of home made yogurt contains more live probiotic cultures than a whole bottle of encapsulated probiotics!
Also eat smaller meals more often throughout the day. Avoid having any bloating or acid reflux, or even indigestion, by taking Ginger Drops remedy or Herbal Digestive Bitters as soon as any of these symptoms appear.

Essential oils can not only help us heal our bodies. They are also very handy in gardening, as a pest deterrent. We have used this recipe to discourage cabbage worms from eating our broccoli, cabbage, kale, and other plants.
It also works against many types of caterpillars, and does not seem to discourage Lady bugs or the Preying Mantis–both of which are beneficial pest eating bugs for your garden.
I found this recipe through dowsing, and it seems to work very well. I sprayed it twice in one week, after finding a large infestation of cabbage worms in several areas of our high tunnel garden.
By the second spraying, the infestation was down to just a few worms where there had been many.
The following week I sprayed again, even though we were not finding worms on 90% of our crops. It seems they have relocated, although we are prepared to spray again if they reappear. This formula does not seem to kill the caterpillars, but does make them go elsewhere quickly!

How to Tell That You Have Cabbage Worms
- Small to medium sized green caterpillars on the underside of leaves, especially broccoli, cabbage, eggplant, kale. Possibly other plants too.
- Large holes in leaves, begin to make the leaf look like lace.
- Small black droppings on leaves.
- Occasional cocoons on the underside of leaves.
- May see small grayish moths.
Recipe for Cabbage Worm Spray
Mix together
1 gallon of water
2 tablespoons Dr. Bronner’s soap (or other castille soap)
10 drops cayenne CO2 extract
20 drops peppermint essential oil
2 drops garlic essential oil (contact us for availability) or 1 clove of garlic mixed in blender with 1 cup water
Shake well. Put spray in a garden sprayer or spray bottle. Spray tops and undersides of leaves.

This cocoa butter deodorant recipe is completely free of dangerous chemicals and ingredients. It is
- Phthalate free
- Gluten free
- Glycerin free
- Aluminum free
- Preservative free
- Sulphate free
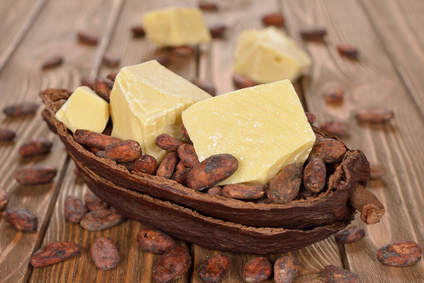
Cocoa Butter Deodorant Recipe
Ingredients:
1 teaspoon beeswax
2 to 3 tablespoons baking soda
8 tablespoons (4 ounces) organic cocoa butter
2 tablespoons cold-pressed unfiltered coconut oil
You will also need:
A plastic fork
A plastic deodorant tube, or a soap mold
Small saucepan
Directions:
Put the beeswax into the pan, along with the coconut oil and cocoa butter. Heat the pan over the lowest heat setting.
Once the beeswax, cocoa butter and oil are completely melted, turn off heat and allow the mixture to cool.
Stir the melted ingredients with the plastic fork. Add the baking soda and stir very well.
Allow the mixture to cool, stirring frequently to keep it well mixed. You may set it in the refrigerator to speed the cooling process. Be sure to keep stirring frequently.
When mixture is fully cooled and somewhat stiff, but still creamey enough to spoon up, spoon the mixture into the container, pressing it in, and set it into the refrigerator to solidify.
If you are using a soap mold instead, spoon the mixture into the soap mold, and set it in the refrigerator.
Note:
You may need to store your deodorant in the refrigerator in summer months. If you want to make your finished product firmer, try adding a little more beeswax to the mix.

By Kathryn Sharp
It is possible to work successfully with essential oils from a purely academic mindset. In this instance, one uses information based on the science and chemistry of aromatherapy, to select essential oils for different conditions and purposes. I have seen this work well for many people.
But this was never enough for me. Having spent years immersed in Native American culture, I knew about the Great Mystery. The Great Mystery is the field of pure potentiality, which contains all things.
Some things are manifest in the physical world, but many more are not presently manifest. Yet all things that ever existed or ever could exist, are already present in the field of potentiality, or Great Mystery. This field is completely conscious, as is the whole of creation.
Earth is conscious, spirits are conscious, plants are conscious, rocks and stars and insects are conscious, inanimate objects even have a form of consciousness in them. From this shamanic perspective, everything is conscious.
For a shaman or indigenous medicine person–all things, all information, all memories, energies, places, beings–can potentially be accessed by those who intentionally engage and communicate with the field. This is is the foundational belief behind energy healing, shamanic paths, spiritual reading, and many religious and spiritual paths.
Though the training methods vary greatly, and the language may be different from one path to another, the underlying truth is the same. Human consciousness is altered in some way so that a different (yet connected) reality is accessed in order to shed light on our ordinary reality, or mundane level of consciousness.

A multitude of possibilities exist for activating this shift in consciousness. It may be accomplished by drumming, singing, toning; by meditation or prayer, in dreams, astral journeying, or by communicating with helping spirits or beings who assist the medicine person.
Many tools exist to facilitate this communication, including hallucinogenic plants, rituals, reading energies or divination, prayer, and meditation.
One form that helped me immensely in my own journey as a medicine person, is dowsing. Dowsing is done with rods (as in the case of locating water or minerals, etc.), or with a pendulum.
Pendulums and rods are energy amplifiers. They simply amplify the energy that is present in a person’s nervous system circuitry. With great commitment and practice, dowsing can be a highly accurate way of accessing information for healing that would not otherwise be available.
For example, I was recently asked about the differences between two similar pure lavender essential oils; the French wild lavender, and lavender fine population.
One can begin by inhaling each oil several times through a 30 minute dry down to discern the aromatic differences. Though they are both distilled from genetically diverse or “wild” lavenders, the aroma of each one is unique. In my opinion, the wild French lavender is slightly more balanced and softer, and the lavender fine is slightly more activating, spicy, and herbaceous.
Of course, both lavenders will have similar healing properties based on the chemistry of lavender essential oil. Yet each oil, in the shamanic perspective, is a living, conscious being. They will interact differently with individuals on a spirit level.
Through accessing another form of information, such as dowsing, wild French lavender essential oil may prove to be much more effective for a person who is healing a skin condition related to stress, for example.
Another person, who is also healing a skin condition related to stress, may dowse positive for the lavender fine. Both lavenders are super effective for this condition, yet one will dowse positive for one person, and the other will dowse positive for another.
I know that when I use a tool such as dowsing or intuitive sensing to select essential oils for treating conditions, I generally have about a 97% effective rate (based on how satisfied people are with the results). When I just choose an essential oil to recommend with my mind–something I almost never do anymore–that rate drops significantly.

So my short answer to the question of what are the differences between these two very similar essential oils, is this. The oils are unique individuals that work differently on energetic and spiritual levels, with the people who are using them. Rooted in the Great Mystery, there is no way to define those differences concretely, other than to smell the two oils, open to experience their gifts individually, and access information from a higher level of consciousness.
This is the way of co-creation, the way of the shaman. It is accessible to anyone who wants to commit the time and attention to practicing this art, and a great place to begin is by simply smelling the oils and allowing your body’s response indicate which oil to choose.

Genital herpes is caused by two types of virus, Herpes simplex type I and Herpes simplex type II. It is estimated that one in 6 people in the USA between the age of 14 and 49 have genital herpes.
It is normally transmitted through sexual contact. Because most Herpes carriers do not even know they are infected and can be symptom free, it is easily spread.
Herbs and essential oils can reduce symptoms and discomfort of this viral condition. With radical commitment to a natural treatment plan, some people have even been known to eliminate all symptoms over a long period of time.
If one is seeking to eliminate this virus from the body, it would be very important to have a blood test to be certain that Herpes is indeed the cause. After concluding the treatment, when the symptoms have been gone for several months, another blood test would be valuable to see whether or not the virus is still in the body.
Herbs Essential Oils for Genital Herpes Healing Regime
- Combine essential oils of ravensare, foraha, and melissa. Add 1.5 ml (about 30 drops) of each oil into a 5 ml bottle. Apply a few drops of this powerful anti-viral blend twice daily to to all break-out areas.
- Make a couple quarts of lemon balm tea and store it in the fridge. It makes a great drench for cleansing the break out areas. Pour it on skin, or dab with a tea soaked cotton pad. It is mild enough to be soothing, and the anti-viral effects will accelerate what the essential oil blend is doing. Use these two anti-viral formulas until the outbreak is completely gone.
- You will also need to deal with this persistent virus internally as well. A special diet must be used consistently. For a time, avoid eating or drinking coffee, soda pop, alcohol, refined carbs such as breads and pastries, and sweetened foods for a few months. Eat lots of fresh and steamed vegetables, fermented foods like yogurt and cole slaw, and small portions of high quality protein foods like eggs, grass fed beef or lamb, and wild salmon. This will enable your immune system to focus on eliminating the virus, instead of spending extra energy cleaning up the toxins produced from processing unhealthy foods. A wonderfully helpful way of eating to support this and other detoxifying programs is available here, at the Ultimate Candida Diet website.
- Take Inner Rain (or an anti-viral detoxifying supplement) daily for up to 3 months at a time. Inner Rain formula will help cleanse and detoxify the body, and support the immune system so that it can do the work to rid the body of the virus.
- Find someone who will apply essential oils to your spine once a week while you are using this program. Even if you have no symptoms or very little break out, the virus can go dormant for years and is known to hang out around the spine. The oils can address this and are an important part of the program. Use a combination of at least three anti-viral oils, including ajowan, spike lavender, melissa, ravensare, foraha, cinnamon bark, and oregano.
I have seen people heal this condition, so I know it is possible! It does take a lot of focus and a strong commitment to get the desired results. Sometimes it takes much longer than I have suggested, even many months, to become free of Herpes viruses. But in many cases the journey is worth it. The immune system will be stronger without that virus floating around in the body.

Hey friends, take a look at the Wonder Bag website. Not only does this bag enable us to slow cook many foods without burning fuel. It is also sold by a great company that gifts a Wonder Bag to a person in need in third world countries, one for every bag purchased online. That is the kind of company I love to support!
My first batch of Wonder Bag bone broth (a paleo diet staple, great for regenerating and reducing the effects of aging too) did not gel in the fridge, and was generally disappointing.
So, with the next batch I made some adjustments and it came out GREAT! It even gelled outside of the fridge as it cooled—a sign that it is very good bone broth, full of collagen and minerals.
So I wanted to share the details of how I made it work in the Wonder Bag.
Wonder Bag Bone Broth
1. First, I added a few chopped veggies with a couple tablespoons of olive oil into a 4 quart pot. I used celery, sweet peppers, carrots, beets, fresh thyme, sage, and savory, a couple of bay leaves, and 2 teaspoons of salt. I cooked them for about 5 minutes over medium heat just until they sizzled a little and the celery began to look translucent.
2. Then I added 4 quarts of water, 2 drops rosemary essential oil, and several large marrow bones from goat and buffalo. I also added 2 chicken feet, which are available from US Wellness Meats. You could substitute chicken wings for the feet, and beef bones for the goat or buffalo bones if you want to.
Be sure to use bones from wild or grass fed/pastured animals, raised without antibiotics, for the healthiest bone broth.
3. I brought the pot to a strong boil over high heat. Once it was boiling for about 10 minutes, I removed it from the fire and immediately put it into the Wonder Bag and closed it up.
4. Now this where I deviated from the suggestions in the Wonder Bag Cookbook. I left the pot in the bag for 4 hours. After about 4 hours, I removed it from the bag, put it back on the stove and reheated it until it boiled. Then I popped it right back in the bag for another 4 hours.
5. I repeated this all day long. Each time I took it out to reheat it on the stove, it took less than 10 minutes to return it to a boil. Then I would re-bag it and go about my day.
6. At night, I reheated the broth for the last time at about 11:30 pm. This time I did not remove it from the bag until 6:30 am when I got up in the morning. It was still nice and hot. I reboiled it two or three more times, until the cartilage was dissolving off the bones, and the broth was thick and rich looking.
7. All in, it took about 30 hours to make this bone broth. And most of that time, I was off working in the high tunnel, doing chores, planting flowers, or anything but cooking!
8. I strained it and poured it directly into quart ball jars, and allowed it to cool to room temperature. It began to gel before it ever went into the fridge.
9. I took it out of the refrigerator the following day. It had gelled into a solid wiggly mass, and it was easy to remove the excess fat that had solidified on the top. This will store for a week or two in the fridge, or longer in the freezer. I like to freeze it in meal size portions ready for adding to vegetables or meats.
Bone Broth is a great regenerator. It supports recovery from disease, depletion, and injury. Bone Broth also supplies vital nutrients, such as collagen, that are lacking in the standard American diet. As we grow older, our bodies stop producing collagen, which causes a break down in our skin, joints and bones. Bone Broth can be added to any vegetable or meat dish, or used in soup and sauces. When taken daily, it can help regenerate bones, teeth, blood, skin, and hair.
It is also very high in minerals that are super absorbable, which boosts the immune and nervous systems in our bodies. Collagen is better absorbed with added Vitamin C, so Bone Broth can be eaten with tomatoes, peppers, kale, broccoli, Brussels sprouts—all of which have more vitamin C than an orange!