
I had been “sudsing shampoo free” for years. One day I just got tired of putting chemicals on my head, and I began a long journey of exploring my options.
I found that so many “natural” shampoos were still laden with chemicals, phthalates, and a multitude of other chemicals. I found several non-sudsing shampoos on the market, but none of them worked for me long term.
Finally I resorted to using the coconut shampoo bar from Chagrin Valley. It worked very well, but sometimes I would feel like the soap was leaving a build up on my hair, so I would switch back and forth with my own suds-free shampoo recipe and the soap.
This has worked beautifully for me over some years now, but every now and then I wish for a really truly natural sudsing shampoo base that I could use once in awhile.
Then we found a source that produces clean, certified organic sudsing bases. These bases are certified organic by EcoCert, an approved for use in Whole Foods products. We immediately fell in love with these products. We now offer them online for our customers. (Decyl Glucoside is available for skin and shampoo formulations; Laurel glucoside is better for household cleaning products, dishes and laundry).
I have already experimented with a couple of my own shampoo recipes, and I am sharing them now for you to experiment with too.
Natural Sudsing Shampoo Recipe
Note: This recipe requires the use of a hand held stick blender.
1/2 cup Decyl glucoside
6 tablespoons rose hydrosol or water
4 tablespoons aloe vera gel (not juice)
6 drops seabuckthorn seed, argan, or neem botanical oil
1/16 teaspoon spirulina powder
1/8 teaspoon vitamin C powder
1/8 tsp xanthin gum
(If you need extra conditioning, add 1/2 teaspoon protein powder)
DIRECTIONS:
Stir the Xanthin gum into 2 Tbsp of the water. Stir very well until there are no lumps and product is smooth.
Place the rest of the water or hydrosol, decyl glucoside, and aloe vera into a 16 oz container for use with your stick blender.
Add xanthin gum mix and blend thoroughly, moving the stick blender up and down until the shampoo thickens and no lumps remain.
Add the rest of the ingredients and blend again.
Test with a ph testing strip. Ph should be between 5 and 7 for shampoo. If ph is too high, add more vitamin C.
Options
You can experiment with using soy protein powder, silk protein powder, hemp powder, etc. Many types of protein powder could be a candidate for nourishing and conditioning the hair.
If you want to add essential oils for therapeutic reasons or for scenting, add just a few drops to see how the formula handles it. Every oil addition will affect the sudsing quality of the base. You must find the balance between oils for conditioning and sudsing shampoo base for cleansing.
Essential Oils for Hair Loss
If you are experiencing hair loss, you may want to try these essential oils or a combination of several. These are the most recommended oils for restoring hair and stimulating the scalp.
Essential Oils for Dandruff
For dandruff, try adding one or several of these oils.
Watch for our updated Decyl Glucoside based mud shampoo recipes coming soon!)

Snoring Solutions with Essential Oils
Snoring is one of those issues that effects not just the snorer, but his or her partner as well! Snoring is associated with sleep apnea, which is a major cause of chronic fatigue, health issues, and even emotional and mental disturbances. And, well–it’s just not sexy.
So if there was an easy and enjoyable way to reduce or eliminate snoring, wouldn’t you jump at the chance to give it a try? I just have to share this with everyone I know, because it has made such a difference in the lives of some of my customers.
This recipe contains some of the most studied oils found to be effective against snoring and sleep apnea. If the recipe below is not quite strong enough, you can resort to the stronger version, which has even more clout, but also has a stronger aroma.
To enhance your potential for success, you can try the following things:
- 20 to 30 minutes before bedtime, diffuse Snoring Solutions Diffusion Blend (see recipe below) in your bedroom. Once you actually go to bed, you can turn the diffuser off, as the air should be saturated.
- Massage neck, upper back, and chest with Anti-Snore Massage Oil (recipe below) just before going to bed. For an extra insurance, massage the oil onto the bottom of your big toes, which are reflex points to the head.
- Use a wedge pillow, or two pillows so that you are on an incline when you sleep.
- Another study found that sleeping on your side, with a full body pillow, works for many people.
- Don’t drink alcohol–it causes the back of the throat muscles to relax enabling snoring. People who don’t normally snore will often snore after consuming alcohol before bedtime.
- Use a neti-pot with saltwater solution to open breathing passages before going to bed.
Anti-Snore Massage Oil Recipe
30 ml or 1 ounce of carrier oil, sweet almond or jojoba
7 drops lavender essential oil
7 drops lemon essential oil
7 drops marjoram essential oil
7 drops Atlas cedar essential oil
16 drops owyhee essential oil (peach artemisia)
Combine oils in a 1 ounce bottle. Shake well.
Massage on neck, upper back, shoulders, and chest, just before you go to bed. Keep the bottle within reach so you can use it again if you should awaken from snoring in the night.
Super Strong Anti-Snore Massage Oil Recipe
Replace essential oils in the recipe above with:
7 drops peppermint essential oil
10 drops thyme linalol essential oil
10 drops lavender essential oil
7 drops river red gum essential oil (eucalyptus camaldulensis)
10 drops owyhee essential oil
Mix and use the same as the first recipe. Rosewood, spruce, citronella, geranium, and clove have all been used successfully for sleep apnea and snoring as well. Please feel free to experiment with this!
Snoring Solutions Diffuser Blend Recipe
In a 5ml bottle, combine:
1 ml (20 drops) thyme linalol essential oil
1 ml (20 drops) river red gum essential oil
1.5 ml (30 drops) rosewood essential oil
1 ml (20 drops) owyhee essential oil
0.5 ml (10 drops) clove essential oil
Diffuse this blend for 20 minutes before you go to bed every night.
Some people notice a decrease in snoring in as little as 3 nights. Others may take up to 6 weeks to see results, so don’t give up too early.
Sometimes people can eventually go without using the essential oils after a period of time on this program. Others find that they need to stay consistent to keep sleep apnea or snoring from returning. Either way, it is a great tool for getting a good night’s sleep (and saving your marriage too!).

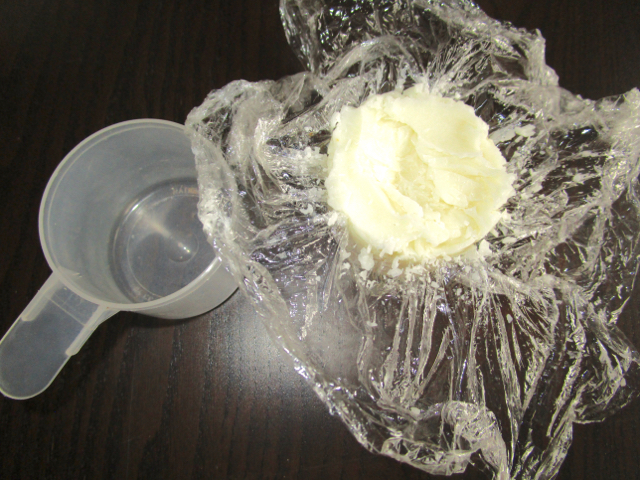
This is my favorite recipe for skin lotion. It is a bit lighter than salves and some of the other lotions that use beeswax to emulsify the fat with water. And the Aloe has a wonderful tightening effect on skin, wonderful for skin that is flabbier aging, or for people who have recently lost weight and have excess skin.
It does create a bit of shine on your skin when applied. I often apply it at night before going to sleep, and allow it to work deep into my skin over night. I have been so happy with the results that I could not wait to share it with everyone.
This lotion is a little more challenging to make than the simple 4 ingredient salve, but it is definitely lighter than any salves made with oils and beeswax only.
Aloe Vera Skin Lotion Recipe
1 tablespoon plus 1 teaspoon beeswax (chunk or shavings)
1/2 cup sweet almond oil
1 teaspoon seabuckthorn seed CO2 extract
1/2 cup aloe vera gel

Place beeswax, almond oil, and seabuckthorn extract in a pint mason jar. Put the open jar into a saucepan. Fill the pan with water, up to 2 or 3 inches up the side of the jar.
Heat pan over low heat. Stir frequently with a plastic or wood spoon or fork. Do not leave utensil in the wax & oil mix, remove each time after stirring.
When the beeswax has completely melted, turn off the heat and remove the jar from the saucepan. Place it on a trivet or hot pad to cool.
If you want to add optional essential oils, now is the time to add them and stir them in well. About 15 drops total is a good amount to add.
Allow mix (also called fat phase), to cool to room temperature. It should just begin to harden sightly around the edges. This will insure that it emulsifies correctly.
You can use a fork, whip, or an immersion blender for this step. Start blending vigorously, and add aloe vera gradually, just a little at a time. Stir after each addition until fully incorporated, then add more and repeat.
Wipe the jar sides down with a spatula and re-blend a couple of times after the mix is fully incorporated.
This Aloe Vera Skin Lotion recipe will store in a glass jar for up to 6 weeks. You may extend the shelf life of this product by adding essential oils.
Essential Oil Suggestions
Add bitter orange, zdravetz, petitgrain sur fleurs, or neroli essential oils for tightening and “lifting” aging skin.
Add rose, lemon, or neroli essential oils for lightening dark spots or decreasing ruddiness and spider veins.
Add argan botanical oil, lavender and patchouli essential oils for preventing aging skin and wrinkles.
Add chamomile or everlasting essential oils, or acai or moringa botanical oils for sensitive or allergic skin.

Many people are getting wise to the chemical based body care products that are marketed to consumers in the USA. Every year I talk with more people who are seeking chemical free products. But even the best products in the health food store contain a few unpronounceable chemical ingredients and preservatives even though they are advertised as “natural”.
Many natural deodorants no longer contain aluminum. But they still may contain glycerin, phthalates, and chemical preservatives.
So what does one use when eliminating chemicals? The only way I know of to truly know what you are putting on your body, is to make your own products.
I and others I know, have thrived for many years using a home made under-arm spray containing only essential oils and hydrosol. But if you are opposed to having to use your deodorant several times throughout the day because it wears off quickly, you might get a better result from using this easy natural deodorant bar recipe.
Natural Deodorant Bar Recipe
Ingredients:
1 teaspoon beeswax, melted
4 tablespoons baking soda
5 tablespoons cold-pressed coconut oil
4 drops leleshwa essential oil
3 drops geranium essential oil
You will also need:
A plastic fork
A 1 pint sized mason jar
Saucepan
Plastic wrap and a small jar or cup OR a soap mold
Put the mason jar into the sauce pan. Add enough water into the pan to cover the sides of the jar 2 to 3 inches.
Put the beeswax into the mason jar, along with the coconut oil. Heat the pan over low heat.
Once the beeswax and oil are completely melted, turn off heat and remove the mason jar from the pan.
Stir the melted oil and wax with the plastic fork. Add the baking soda and stir very well.
Allow the mixture to cool, stirring frequently to keep it well mixed.
When mixture is cooled to room temperature, line your cup or small jar with plastic wrap. Pour the mixture into the container and set it into the refrigerator to solidify. If you are using a soap mold instead, pour the mixture into the soap mold, and set it in the refrigerator.

Allow several hours for the bar to cool completely. Then remove the bar from mold or jar.
If you used a small jar, cup, or long shape, you can wrap half of the bar with plastic wrap.

For added ease in handling, wrap a layer of tissue paper on top of the plastic. Tape it together so it stays. Now the bar is easy to apply to underarms without touching.

In the summer season, you may need to store your deodorant bar in the refrigerator. If you have a cool bathroom closet, you may be able to store it there. Just remember, coconut oil liquifies at around 76 to 78 degrees.
Deodorant and Cancer Recovery
One of the first things to consider when facing cancer recovery, is the elimination of phthalates and other chemical ingredients from all body care products.
Deodorants are one of the worst culprits in the “harmful for cancer patients” category. They contain at least several substances that don’t contribute to recovery–including phthalates, aluminum derivatives, and others. Even a lot of the “natural” deodorants found in health food stores and supermarkets, are packed with chemicals that just do not belong on a woman’s body when she is recovering from this disease (in my humble opinion).
Not to mention the fact that deodorant is applied to the underarms, in the very same location where lymph glands are often infected with cancer. Does that seem like a coincidence to you?
I don’t believe in coincidence.

For the past few years, Michael and I have been living mainly gluten free. I will admit, the switch was not as easy as one might think it could be.
So many of the gluten free recipes I had tried in the past, left me dissatisfied with the results. I had always loved the texture and flavor of whole wheat flour, and nothing else would really measure up for me.
When I finally let go of wheat and all of its relatives (faro, Emmerer, and Kamut), I was astounded at the difference in my level of physical health and well-being. But I was still a bit uninspired by the grain free baking choices that were available.
After a couple of years of experimentation, as well as getting some great recipes from my gluten free daughter, I am much more satisfied with the results when I bake these days.
I now know that one must combine several different types of flour to get a good texture, moist and not dry, while still making sure the dough or batter will stick together.
So here is one of my favorite recipes that meets all of these criteria, while also being naturally low in sugar (yes the blueberries contain some sugar) and DELICIOUS. I hope you will enjoy it as much as we have.
Moist and Gluten Free Blueberry Muffins Recipe
Ingredients:
3/4 cup solid cold-pressed coconut oil
1/2 cup plus 1 tablespoon Xylitol (if you like muffins on the sweeter side, use 1 cup) Here is a link to a company that sells real birch xylitol, made in the USA. I feel it is greatly superior to corn xylitol, which is mostly made in China. http://www.wholeandnatural.com/health-garden-real-birch-xylitol-1-lb/

3 pasture raised chicken eggs

1/4 cup water mixed with 1/4 cup live cultured organic yogurt or nut milk
1/4 teaspoon unrefined sea salt
2 teaspoons aluminum free baking powder
1 tablespoon ground flaxseed
1-1/4 cups almond flour

1/2 cup coconut flour
2 to 3 drops allspice essential oil
2 cups blueberries

Prepare a muffin pan. Line the muffin cups with paper liners, or lightly coat with coconut oil.
Preheat oven to 325 degrees. (I cook mine in a solar oven, which normally only reaches 275 or 300 degrees. In this case you will need to cook them longer).
In a medium size mixing bowl, combine coconut oil, xylitol, and eggs. Whip or stir vigorously until well blended.
Add eggs. Beat them into the batter one at a time.
Add nut milk or yogurt/water mix. Stir well until blended.
Add salt and baking soda. Mix well.
Add flours. Mix well after each addition.
Add allspice essential oil and mix well.
Add blueberries, and stir gently until well blended.
Cook in heated oven until a toothpick inserted in the center of the muffin comes out clean. After 15 minutes, check frequently so that muffins do not over cook and dry out.
Remove muffins from the oven when done. Allow them to cool for a few minutes, then invert the pan on a plate.
Serve them hot or wait until they cool. At our house, they don’t last long!